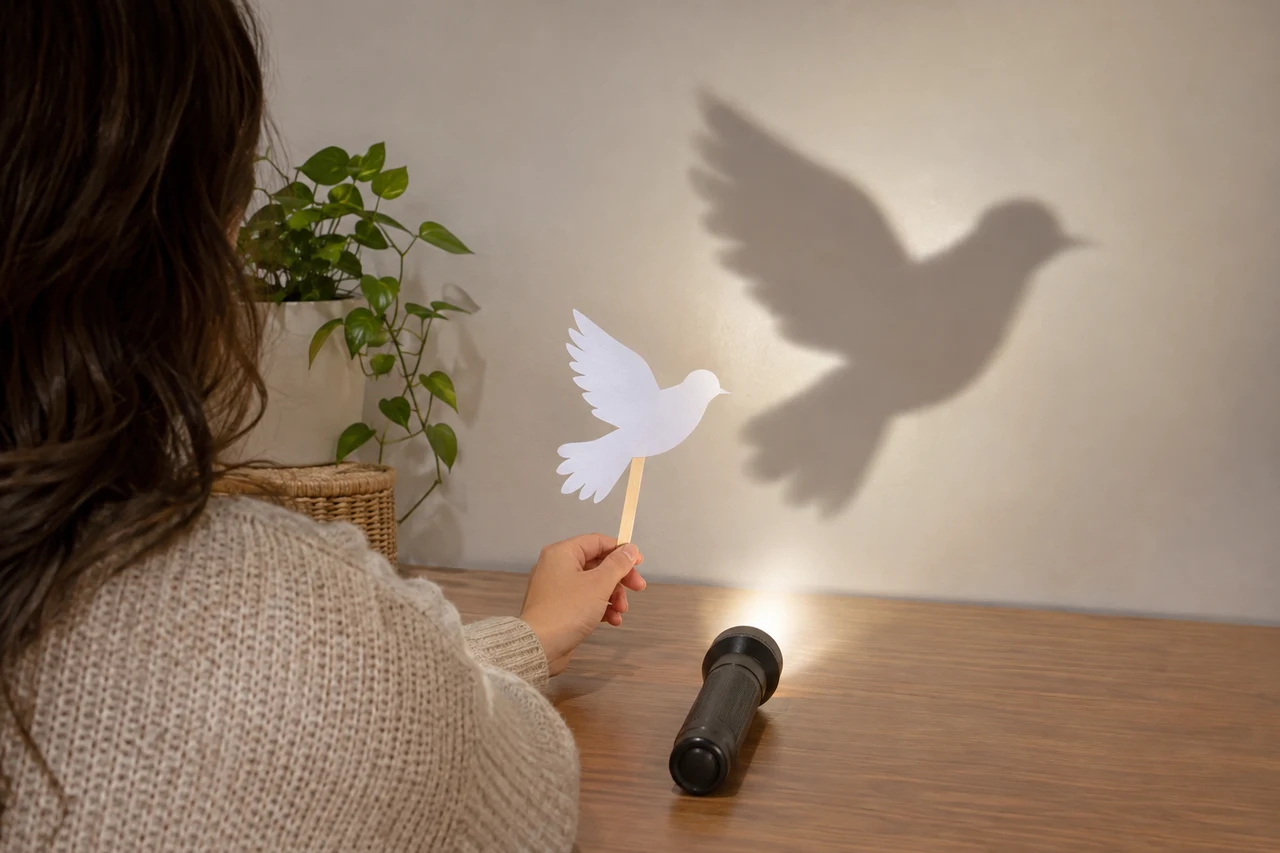
One paper bird can appear to approach an audience without changing the cutout. Move it toward the light and its shadow grows; move it toward the screen and the shadow becomes smaller. That change supplies the central action in the original short scene below. It is a small home performance built around position, not a claim about a child's learning or a report of a show we tested. The Ballard Institute and Museum's paper-shadow workshop lists a phone light or flashlight, paper, a handle and a wall or floor as possible materials. Saskatchewan Science Centre explains the size relationship between an object and its light source. Our bird, cue sequence and ray drawings are separate original work, rather than copied workshop puppets or a reproduction of a museum activity sheet.
Prepare one cutout and a clear projection space
For an adult-led setup, gather opaque cardstock, a pencil, ordinary scissors, tape, a blunt drinking straw or craft stick and an unmodified phone flashlight. Use a plain light-colored wall as the projection surface. The wall avoids having to suspend a sheet or build a frame for this short scene. Keep the floor and the route around the table clear, with enough room light left to move normally.
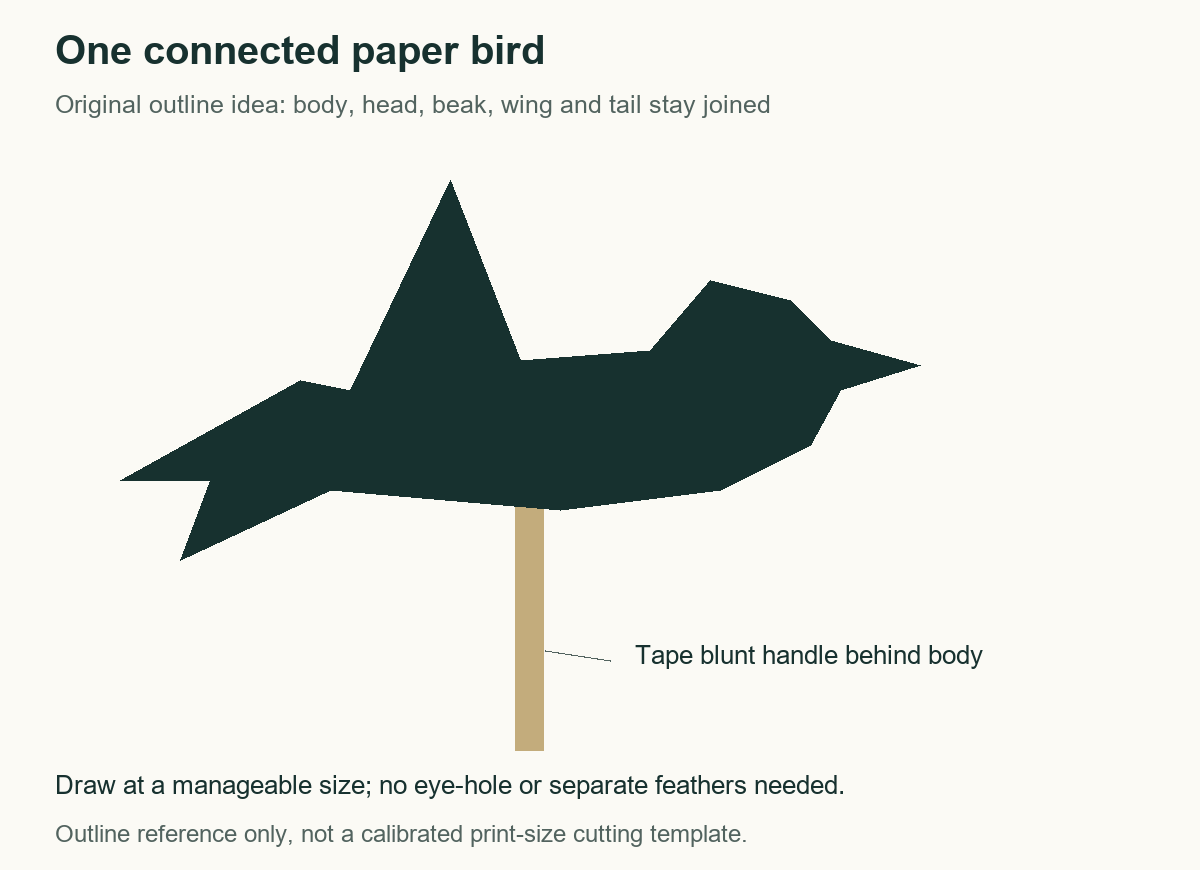
Draw a side-view bird approximately eight centimeters from tail to beak. Begin with an oval body, add a triangular tail at the left, a head and small beak at the right, and one broad upward wing touching the body. Cut around the outside as a single connected silhouette. The original drawing shows one possible outline; no feather details or cut-out eye are needed. Tape the blunt handle to the back of the body so it can be held without covering the silhouette.
An adult handles the cutting and light setup, following the actual device's instructions. Place the light on a stable surface facing the wall and keep the beam away from eyes. Do not remove a lens, cover the light, use a flame or modify the device. A phone light is not being described as cool to touch or suitable for indefinite running merely because it is familiar.
Find the two positions before starting the scene
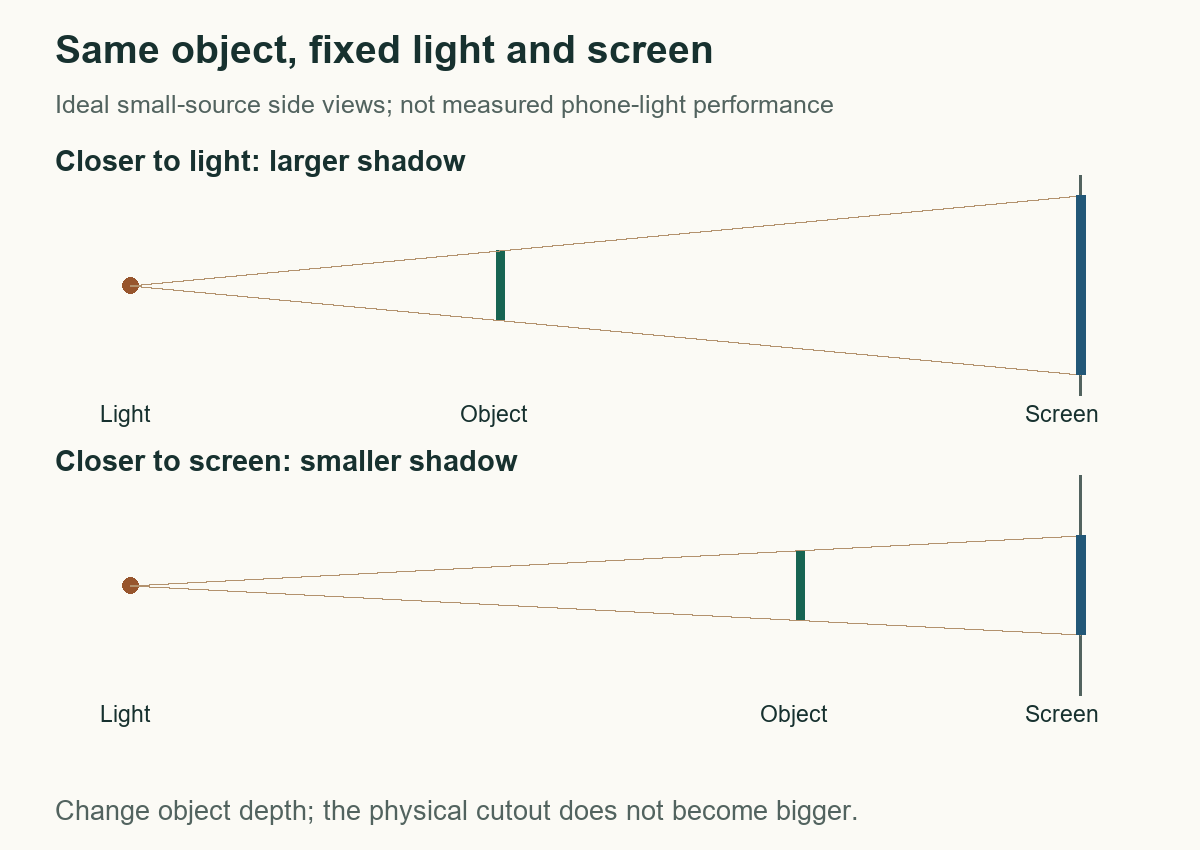
Hold the bird between the light and wall, with its broad face presented to the beam. Keep the light and wall fixed. Move the bird along that light-to-wall direction, noticing a smaller shadow nearer the wall and a larger one nearer the light. Select two manageable positions where the whole shadow remains on the wall. Let the adult controlling the setup establish the available space rather than stretching toward the light to chase a particular size.
The side-view diagrams isolate the relationship using an ideal small light source. They are not a measured drawing of a phone, and the outlines are not a promise that every light gives a perfectly sharp edge. If the actual outline is unclear, simplify the silhouette or adjust the ordinary setup within the device's instructions; do not dismantle the light to imitate the drawing.
Try a simple entrance: bring the bird into the beam at the smaller-shadow position, pause, move it to the larger-shadow position, then return it. The puppet remains the same physical object. Its changing projection supplies the approach and retreat in the story, so the performer does not need to cut a second larger bird.
Perform The Bird and the Borrowed Sky
This is an approximately two-minute cue plan with pauses, not a timed performance result. One adult can narrate and move the bird, or a willing second person can read. The audience has no required task.
0:00–0:20 — Begin with the small shadow near the lower part of the wall. Narrator: “A little bird found a sky no wider than a window. It took three careful steps and wondered whether there was room to fly.” Move the bird a short distance sideways, keeping its small-shadow depth.
0:20–0:45 — Move slowly toward the light to enlarge the shadow. Narrator: “The bird leaned into its question. Its wing spread across the borrowed sky. Perhaps, it thought, a larger wing would make the answer easier.” Pause with the larger outline fully visible.
0:45–1:10 — Keep the large shadow still. Narrator: “But the bird could no longer see the edge of its own journey. It had become very grand and not very certain.” Leave a quiet pause; no audience response is needed.
1:10–1:40 — Move back toward the wall to reduce the shadow, then travel sideways across the available surface. Narrator: “So it stepped back. The sky returned around it. There was room for a beginning, a crossing and somewhere to arrive.” Keep the same cutout facing the beam.
1:40–2:00 — Let the small bird pause, then leave the beam. Narrator: “The bird had not found a bigger sky. It had found a way through the one it had.” End by switching the light off using its ordinary control.
Make the next revision about one visible choice
If another run appeals, change only the length of the large-shadow pause. Alternatively, keep the timing and reverse the direction of the sideways crossing. Discuss which choice supports the story rather than treating size as an automatic measure of a better performance. Put the device and cutting tools away appropriately when finished.
Sources & further reading
Published sources for the details and examples discussed in this story.